I wrote a thing about Pushing Delta 3200 which very lightly skimmed over a lot of actually pretty interesting things. I gave a high-level overview of how I develop a specific black and white film (with a lot about why I do it that way) but I’d like to explore some of the technical stuff a bit more. It’s a good excuse for me to research these things.
Seems logical to talk about what film actually is and how it works.
Note: I’m definitely not a physicist or a chemist so let’s keep this simple.
Plastic, Silver Salt, and… Jello? Link to heading
In its most basic form, photographic film is a bunch of silver salt crystals (we’ll call them “grain” when they’re developed), suspended in gelatin, on a layer of protective plastic.
The silver salts (more precisely “silver halides”) you’ll find in photographic film are silver chloride (AgCl), silver bromide (AgBr), and silver iodide (AgI). These aren’t completely dissimilar to a halide we’re very familiar with, sodium chloride (NaCl), but they do have a handy physical property that makes them an essential part of photographic film: photosensitivity. They darken very quickly when exposed to light!
These silver halides are suspended in gelatin to form the “photographic emulsion” which is not really an emulsion but that’s the term that stuck. Gelatin in this case is the same stuff that makes Jello wiggle. I did some digging while writing this and couldn’t find a photographic film that does not use gelatin. I found this kind of mind-blowing.
Since gelatin by itself would be relatively delicate, the silver-gelatin suspension is applied to a plastic protective film and voilà! You have extremely basic black-and-white photographic film! We’ll talk about other elements of the design later.
Film and Light Link to heading
We have a strip of plastic with a layer of gelatin on it and a bunch of chunky silver halide crystals suspended in the gelatin. Let’s say we expose it to some light.
Photons, the fundamental particles that represent electromagnetic radiation such as light (including UV and infrared light), fly through our gelatin. Some of those photons hit the surface of one of our silver halide crystals! When this happens, some of the silver halide molecules reduce leaving a few atoms of metallic silver on the crystal. Remember the darkening I mentioned in the previous section? This is what’s happening under the hood. With sufficient exposure, there’ll be clusters of metallic silver atoms that will form what’s called a latent image. The latent image is persistent and quite stable, especially when kept cool.
Now that you’ve exposed your film, you’re off to the darkroom!
Developing the Film Link to heading
An important note: “Developing the film” is often how you’d describe the entire process of taking a shot roll of film and turning it into stable (no longer light-sensitive) negatives that you can scan or print. This process involves a few steps and you can get a good idea of what’s involved by checking out my post about Pushing Delta 3200. The first of these steps is quite literally the developer step and, for the rest of this post, when I use the term “develop”, that specific step is what I’m referring to unless otherwise noted.
Development of a single crystal of silver halide is a binary thing. It’s either developed or it’s not. 1 or 0. It doesn’t half happen but it also doesn’t happen immediately upon making contact with the developing solution. Those clusters of metallic silver atoms created during exposure are catalysts which shorten the time it takes for the developer to flip the bit, shall we say. It might he helpful to think of the development of an individual crystal as being set to a kitchen timer. The strength of the initial exposure lowers the amount of time initially set on the timer. Once started, it’ll tick it’s way down until ding!, the entire silver halide crystal has turned into dark, developed grain of metallic silver.
When zooming out and looking at an entire frame, you have millions and millions of silver halide crystals present, sort of like little pixels. So even though this is a binary process at the individual crystal level, smooth tonal gradients from black to white in the final image are entirely possible. Crystal size varies and bigger crystals can have bigger clusters of silver which means the supposed kitchen timer has a shorter initial time. Also, not every crystal will necessarily be exposed in the same manner. If you think of a soft light at the centre of the frame, the centre of that light is where exposure was most intense, fading off as you move away from it. Thus, the neighbouring crystals will have varied times set on their own little individual kitchen timers. That said, detailed edges are also possible because sharp delineations between exposed regions will result in sharp differences in the delay times between neighbouring crystals. The neighbours don’t talk to each other, so if one has a big cluster of metallic silver due to intense exposure to light, the one next door might not.
There is a point where something can be underexposed enough that it just can’t be developed. This is why pushing film increases contrast dramatically. You can’t develop detail that isn’t there so the least exposed areas will fail to develop while you push detail more and more in the exposed areas.
Once the development step is done, we still have a bunch of undeveloped silver halide crystals left lying around in the image in areas that were not exposed to a lot of light and FWIW, the fixing step (which happens after development) is what removes those.
Also: Keep in mind that we’re dealing with negatives here. Highlights in the resulting final image will be the ones that were exposed the most and turned darker on the negative. Shadows on the final image will be the parts that received less exposure and (after the fixing step) result in a more transparent section of the negative.
Improving the Design A Bit Link to heading
Modern black and white film is a lot more complex than a piece of plastic covered in a layer of Jello with some salt suspended in it. I mentioned before that there are a few things we can do to make our film a bit more useful.
The biggest drawback in the simple design described above is that it’s actually only photosensitive to blue and UV light! This hurdle was overcome at the start of the 1900’s by adding dyes to the photographic emulsion to make it “panchromatic” or sensitive to the full range of visible light. When you think of a photographer working under a deep red light in a darkroom, they’re using “orthochromatic” film which is not sensitive to red light.
It’s worth noting that modern black and white film is still quite sensitive to UV light. Many photographers will overcome this by using a UV filter in front of their lens to prevent the UV light from fogging up their images. Unless of course that’s what they’re going for!
Modern films also have another layer that prevents light from reflecting inside the film and causing fogging or discolouring. This is called an anti-halation backing.
Revisiting Film Speed in Practical Terms Link to heading
When we talk about film speed, we’re describing how sensitive a film stock is to light. Modern film comes in a number of speeds and are described by film manufacturers with an ISO value. This might be written as ASA but honestly, a comparison of film speeds and the resulting images sounds like it should be its own little essay.
So to be precise: for a given lighting situation, with the other parameters of exposure (shutter speed, aperture) kept the exact same, using the default development technique, a “faster film” will result in a brighter image.
So what is it that makes film faster or slower?
Mainly the size and design of the crystal structure of the silver halides that are present in the photographic emulsion. Bigger crystals will give more surface area for light to hit and thus make the film more photosensitive. A wide light-facing surface area (this is the T in Kodak T-Max) also allows the film to be more efficient which enables both extremely fast, usable films (such as Ilford Delta 3200 and T-Max P3200) and very detailed films at user-friendly speeds (such as Kodak T-Max 100).
High-quality slow film will have fine grain. If that is shot and developed well, the resulting image will be crisp with a very light texture and lots of sharp detail. The faster the film, the grainier it gets until you end up with a photograph that looks like it’s been coated in road salt. I think fast film looks awesome so “higher image quality” really depends on what you’re going for. With that said, slower films can capture more detail due to their design and are therefore more enlargement-friendly than fast films.
Examples Link to heading
All of these examples were scanned as RAWs with a Nikon D850, a 60mm Micro Nikkor 2.8G, and processed in Adobe Lightroom using Negative Lab Pro.
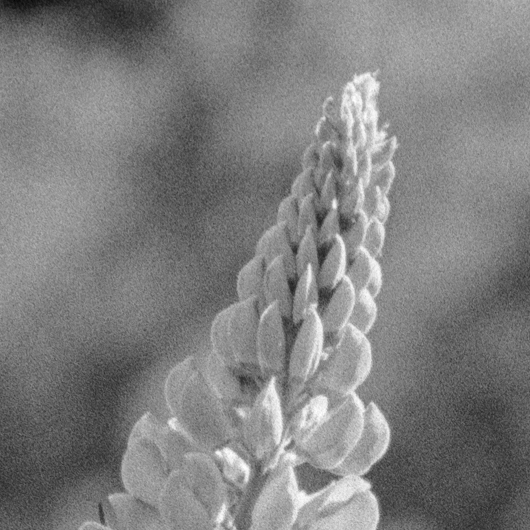
Full res crop of Ilford ORTHO Plus ISO 80 film Link to heading
Fine grain, relatively sharp edges. You can see some petal detail. I could have shot this sharper I think but who looks at things this closely IRL?
Fun note: this is also an orthochromatic film! I briefly mentioned this above. TL;DR: This film can’t see reds very well (if at all) and they will be rendered much darker in the final image.

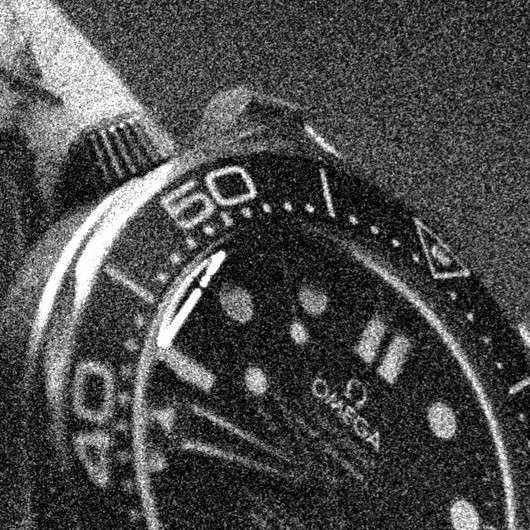
Full res crop of Delta 3200 pushed to 12800 Link to heading
Pushing the film exaggerates the grain but you can certainly see the difference. Still sharp and still has detail but that’s some coarse grain for sure.
I absolutely love Delta 3200. This is such a fun film to shoot with the speed and the ridiculous grain.

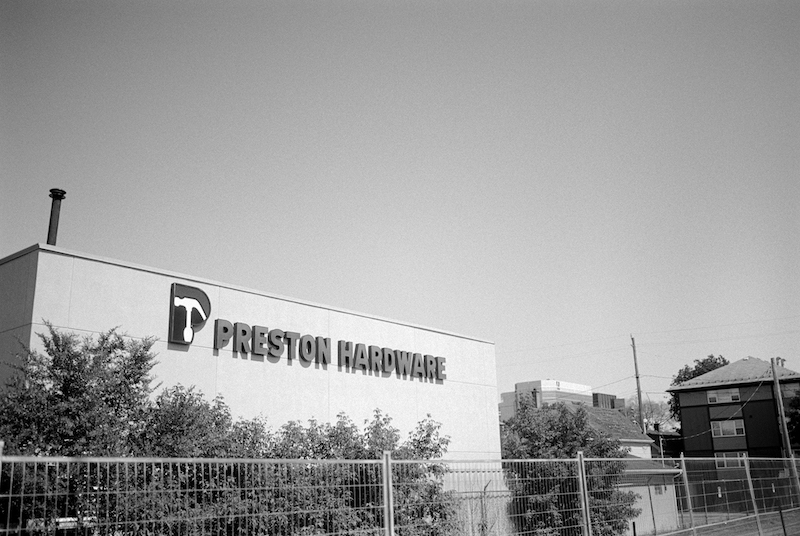
Hardware store on Ortho 80 Link to heading
Resized to web, the grain is almost invisible.

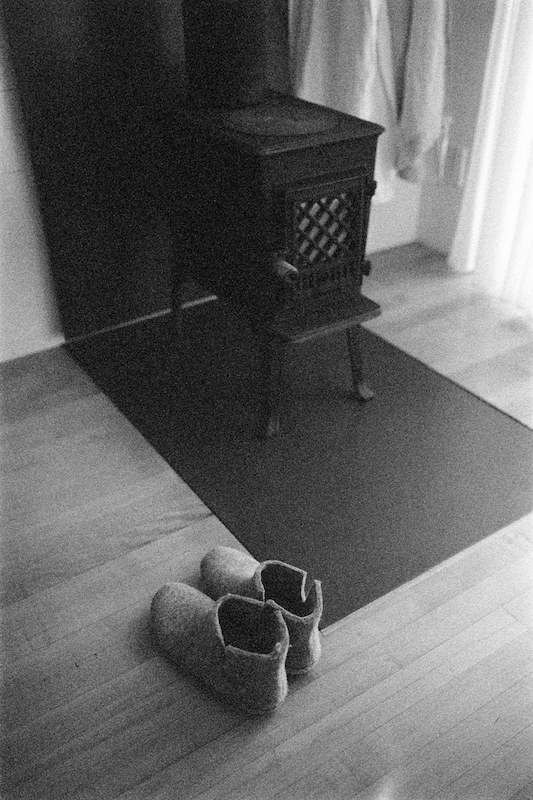
Wood Stove on Delta 3200 Link to heading
Grain is still very apparent, even resized for web, especially in shadow areas.

That’s it! Link to heading
This was fun. Be sure to read my post about Delta 3200 too for a bit more context and a higher-level view of the whole film development process.